

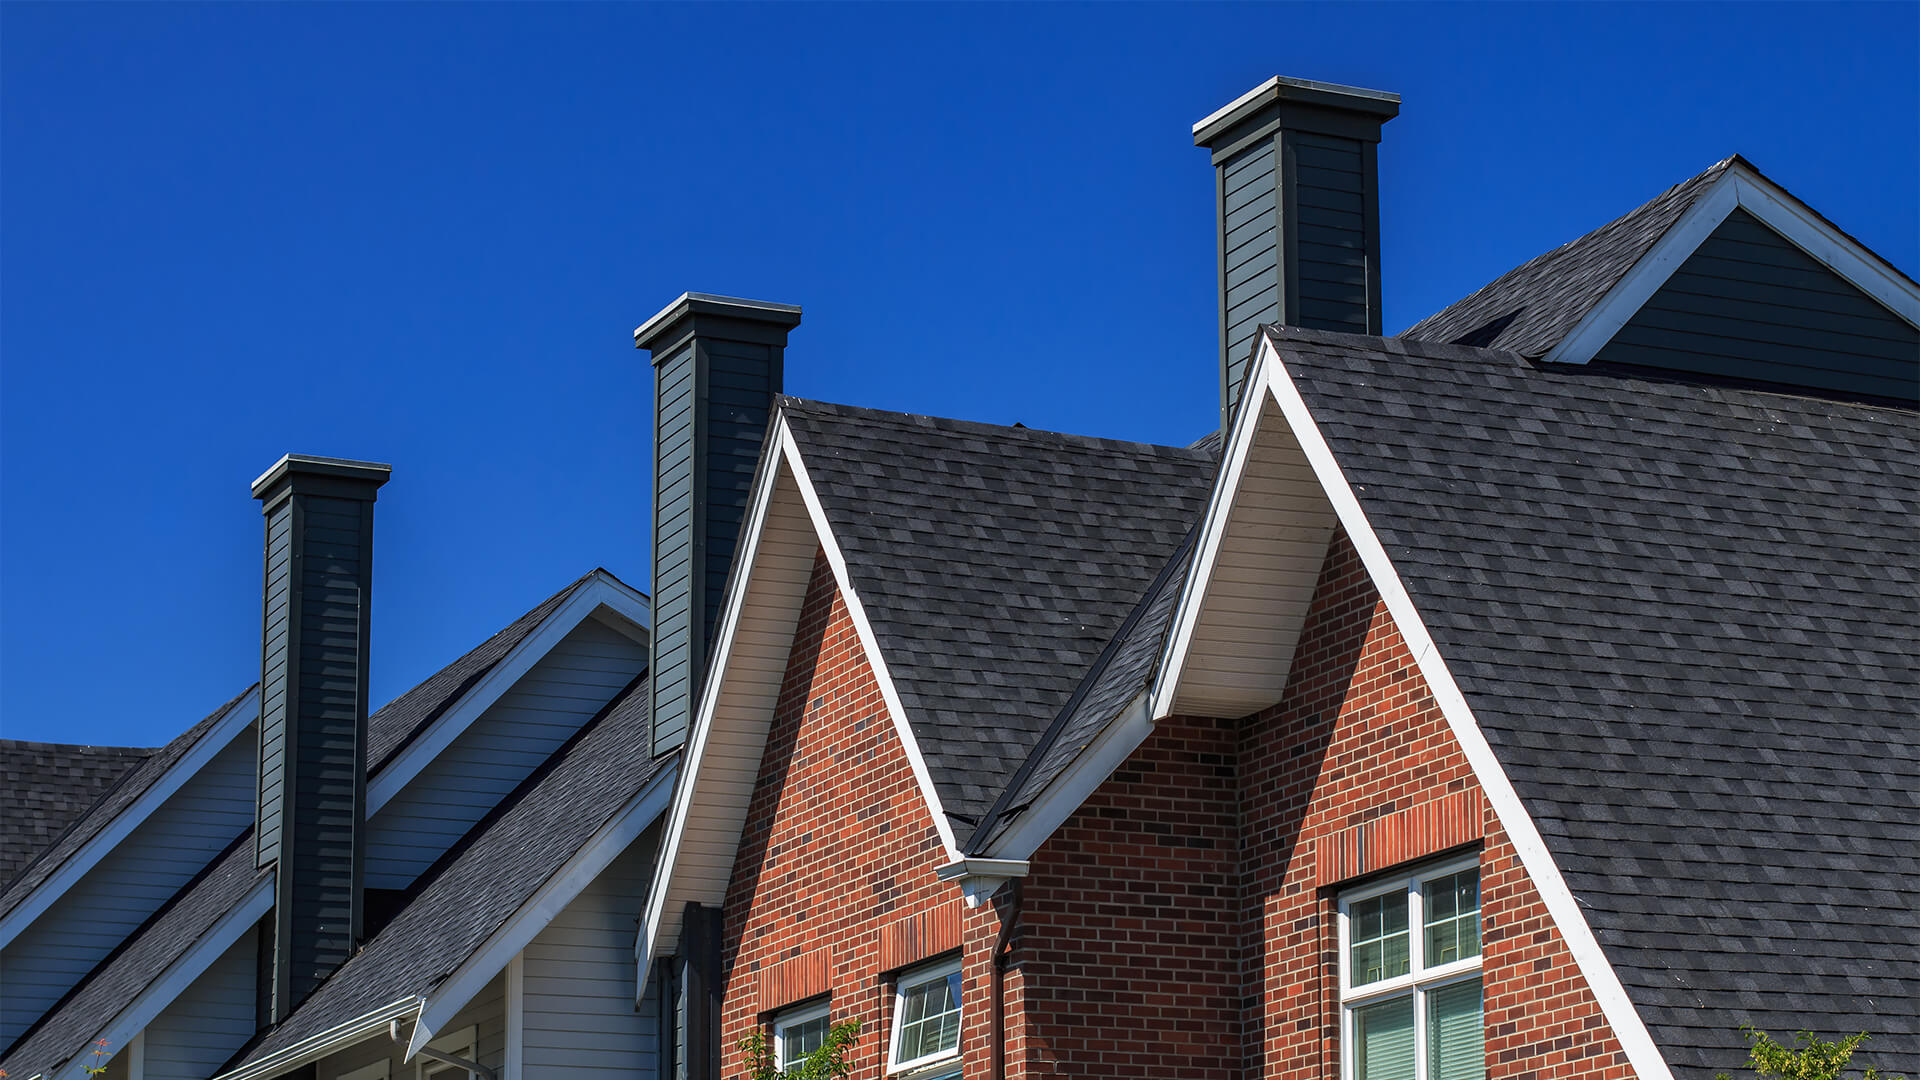
Chimney maintenance is an essential part of keeping your home safe and comfortable. Many homeowners overlook the importance of regular chimney maintenance, but neglecting this task can lead to serious problems down the line. Regular chimney maintenance not only ensures the proper functioning of your chimney but also helps prevent potential hazards such as chimney fires and carbon monoxide leaks.
Regular chimney maintenance offers several benefits. Firstly, it helps to maintain the efficiency of your chimney. Over time, soot and creosote can build up in the flue, reducing the airflow and causing your fireplace or wood-burning stove to work less efficiently. Regular cleaning removes these deposits, allowing for better airflow and more efficient heating. Secondly, regular maintenance helps to prevent chimney fires. Soot and creosote are highly flammable, and if they accumulate in your chimney, they can ignite and cause a dangerous fire. By regularly cleaning your chimney, you reduce the risk of a chimney fire occurring. Lastly, regular maintenance helps to prolong the lifespan of your chimney. By addressing any damage or issues promptly, you can prevent further deterioration and costly repairs in the future.
Key Takeaways
- Regular chimney maintenance is important to prevent potential hazards and ensure proper functioning.
- Inspect your chimney for damage, including cracks, leaks, and blockages, before cleaning it.
- Thoroughly clean your chimney, including the flue, using appropriate tools and techniques.
- Replace any damaged bricks and mortar to maintain the structural integrity of your chimney.
- Install a chimney cap and waterproof your chimney to prevent water damage and animal intrusion.
Step 1: Inspect Your Chimney for Damage
Before starting any maintenance or cleaning tasks, it is important to inspect your chimney for any signs of damage. Some common signs of chimney damage include cracks in the bricks or mortar, loose or missing bricks, water stains on the ceiling or walls near the chimney, and a strong odor coming from the fireplace or stove. If you notice any of these signs, it is important to address them promptly to prevent further damage.
To inspect your chimney, start by visually examining the exterior for any visible signs of damage. Look for cracks in the bricks or mortar, as well as any loose or missing bricks. Next, go inside and check for water stains on the ceiling or walls near the chimney. This could indicate a leak or water damage. Finally, check for any odors coming from the fireplace or stove. A strong, unpleasant odor could be a sign of a chimney blockage or other issues.
Addressing chimney damage is crucial to maintaining the safety and functionality of your chimney. Cracks in the bricks or mortar can allow water to seep into the chimney, leading to further deterioration and potential structural issues. Loose or missing bricks can also pose a safety hazard, as they can fall and cause damage or injury. By addressing these issues promptly, you can prevent further damage and ensure the proper functioning of your chimney.
Step 2: Clean Your Chimney Thoroughly
Regular chimney cleaning is an important part of chimney maintenance. Over time, soot and creosote can build up in the flue, reducing airflow and increasing the risk of a chimney fire. Cleaning your chimney thoroughly removes these deposits, allowing for better airflow and reducing the risk of a fire.
To clean your chimney, start by gathering the necessary tools and materials. You will need a chimney brush, a ladder, a drop cloth or tarp to protect your floor, and a vacuum cleaner with a HEPA filter to clean up any debris. It is also important to wear protective gear such as gloves and goggles to protect yourself from soot and debris.
Begin by placing the drop cloth or tarp around the fireplace or stove to protect your floor from any debris that may fall during the cleaning process. Next, climb onto the roof using a ladder and locate the chimney cap. Remove the cap and set it aside. Attach the chimney brush to an extension rod and carefully insert it into the flue. Use an up-and-down motion to scrub away any soot or creosote buildup. Continue this process until you have cleaned the entire length of the flue.
Once you have finished cleaning the flue, use a vacuum cleaner with a HEPA filter to clean up any debris that may have fallen into the fireplace or stove. Be sure to clean the chimney cap as well before reattaching it.
Step 3: Replace Damaged Bricks and Mortar
| Task | Materials Needed | Time Required | Cost |
|---|---|---|---|
| Remove damaged bricks and mortar | Chisel, hammer, safety goggles, gloves, dust mask | 2-4 hours | 0 |
| Clean the area | Broom, dustpan, water, scrub brush | 1-2 hours | 0 |
| Prepare new bricks and mortar | New bricks, mortar mix, trowel, bucket, water | 2-4 hours | 50-100 |
| Replace bricks and mortar | Trowel, level, rubber mallet, jointer tool | 4-6 hours | 0 |
| Clean up the area | Broom, dustpan, water, scrub brush | 1-2 hours | 0 |
If you notice any cracks, loose bricks, or deteriorating mortar during your chimney inspection, it is important to replace them promptly. Damaged bricks and mortar can allow water to seep into the chimney, leading to further deterioration and potential structural issues.
To replace damaged bricks and mortar, start by removing any loose or damaged bricks. Use a chisel and hammer to carefully remove the damaged bricks, taking care not to damage any surrounding bricks. Once the damaged bricks have been removed, use a wire brush to clean the area and remove any loose debris.
Next, mix a batch of mortar according to the manufacturer’s instructions. Apply a layer of mortar to the area where the damaged bricks were removed, using a trowel to smooth it out. Carefully place the new bricks into the mortar, pressing them firmly into place. Use a trowel to apply additional mortar between the bricks, filling in any gaps. Smooth out the mortar with a trowel or jointing tool, and allow it to dry according to the manufacturer’s instructions.
Replacing damaged bricks and mortar is essential for maintaining the structural integrity of your chimney. By addressing these issues promptly, you can prevent further deterioration and potential safety hazards.
Step 4: Install a Chimney Cap
Installing a chimney cap is an important step in chimney maintenance. A chimney cap serves several purposes, including preventing animals from entering your chimney, keeping out debris such as leaves and twigs, and preventing rainwater from entering the chimney.
To install a chimney cap, start by measuring the dimensions of your chimney flue. Choose a chimney cap that is appropriate for your flue size. Next, climb onto the roof using a ladder and locate the chimney cap. Remove the old cap if necessary.
Place the new chimney cap over the flue opening, ensuring that it is centered and level. Use a screwdriver or drill to secure the cap in place, following the manufacturer’s instructions. Once the cap is securely attached, check that it is level and properly aligned.
There are several types of chimney caps available, including single-flue caps, multi-flue caps, and top-mount caps. Single-flue caps cover only one flue, while multi-flue caps cover multiple flues. Top-mount caps are installed on top of the chimney crown and cover the entire chimney opening. Choose a chimney cap that is appropriate for your needs and the size of your chimney.
Installing a chimney cap helps to prevent animals from entering your chimney, which can cause blockages and potential hazards. It also helps to keep out debris such as leaves and twigs, reducing the risk of a chimney fire. Additionally, a chimney cap prevents rainwater from entering the chimney, which can cause damage and deterioration.
Step 5: Waterproof Your Chimney
Waterproofing your chimney is an important step in maintaining its structural integrity and preventing water damage. Over time, water can seep into the bricks and mortar of your chimney, causing deterioration and potential structural issues. Waterproofing your chimney helps to prevent this damage by creating a barrier that repels water.
To waterproof your chimney, start by cleaning the surface of the bricks and mortar. Use a wire brush to remove any loose debris or dirt. Next, apply a waterproofing sealant to the surface of the bricks and mortar, following the manufacturer’s instructions. Be sure to cover all areas thoroughly, including any cracks or gaps.
Once the sealant has dried according to the manufacturer’s instructions, apply a second coat for added protection. It is important to choose a high-quality waterproofing sealant that is specifically designed for use on chimneys. This will ensure that it provides the best possible protection against water damage.
Waterproofing your chimney helps to prevent water from seeping into the bricks and mortar, reducing the risk of deterioration and potential structural issues. By creating a barrier that repels water, you can prolong the lifespan of your chimney and avoid costly repairs in the future.
Common Chimney Problems and How to Fix Them
While regular maintenance can help prevent many chimney problems, there are some common issues that may still arise. It is important to address these problems promptly to prevent further damage and ensure the safety of your home.
One common chimney problem is a chimney blockage. This can occur when debris such as leaves, twigs, or animal nests accumulate in the flue, obstructing airflow. A chimney blockage can cause smoke to back up into your home and increase the risk of a chimney fire. To fix this problem, start by inspecting the flue for any visible blockages. Use a chimney brush or other tool to remove any debris that may be causing the blockage. If you are unable to remove the blockage yourself, it is important to call a professional chimney sweep for assistance.
Another common chimney problem is a chimney leak. This can occur when water seeps into the bricks and mortar of your chimney, causing damage and deterioration. Signs of a chimney leak include water stains on the ceiling or walls near the chimney, a musty odor coming from the fireplace or stove, and visible signs of water damage on the exterior of the chimney. To fix this problem, start by inspecting the exterior of the chimney for any visible signs of damage or deterioration. Replace any damaged bricks or mortar, and apply a waterproofing sealant to prevent further leaks. If the leak persists, it is important to call a professional chimney sweep for further inspection and repair.
Other common chimney problems include cracked or damaged chimney crowns, damaged chimney liners, and damaged or malfunctioning chimney dampers. These issues can all affect the safety and functionality of your chimney and should be addressed promptly. It is important to consult a professional chimney sweep for assistance with these types of repairs, as they require specialized knowledge and expertise.
Tools and Materials You’ll Need
To perform chimney maintenance and repairs, you will need a variety of tools and materials. Here is a list of some common tools and materials you may need:
– Chimney brush: Used for cleaning the flue
– Extension rods: Used to attach the chimney brush and reach the entire length of the flue
– Ladder: Used to access the roof and chimney
– Drop cloth or tarp: Used to protect the floor during cleaning or repair tasks
– Vacuum cleaner with HEPA filter: Used to clean up debris
– Chisel and hammer: Used to remove damaged bricks
– Wire brush: Used to clean the area before replacing bricks or mortar
– Mortar mix: Used to replace damaged mortar
– Trowel: Used to apply mortar and smooth it out
– Jointing tool: Used to smooth out mortar between bricks
– Chimney cap: Used to prevent animals, debris, and water from entering the chimney
– Waterproofing sealant: Used to protect the chimney from water damage
These are just some of the tools and materials you may need for chimney maintenance and repairs. The specific tools and materials required will depend on the task at hand. It is important to choose high-quality tools and materials that are appropriate for your specific needs.
Safety Tips for DIY Chimney Repair
When performing DIY chimney repair, it is important to prioritize safety. Working on a chimney can be dangerous, so it is crucial to take the necessary precautions to protect yourself.
Firstly, always wear protective gear such as gloves, goggles, and a dust mask when working on a chimney. This will help protect you from soot, debris, and other potential hazards.
Secondly, use caution when climbing ladders or accessing the roof. Ensure that the ladder is stable and secure before climbing, and always have someone nearby to assist if needed.
Thirdly, be mindful of your surroundings and the weather conditions. Avoid working on a chimney during inclement weather or high winds, as this can increase the risk of accidents.
Lastly, if you are unsure about any aspect of chimney repair or maintenance, it is best to call a professional chimney sweep for assistance. They have the knowledge, experience, and specialized equipment to safely and effectively perform chimney repairs.
When to Call a Professional Chimney Sweep
While many chimney maintenance tasks can be performed by homeowners, there are certain situations where it is best to call a professional chimney sweep for assistance.
If you are unsure about any aspect of chimney maintenance or repair, it is best to consult a professional. They have the knowledge and expertise to properly assess your chimney and address any issues that may arise.
Additionally, if you encounter any major issues such as extensive damage or structural problems, it is important to call a professional chimney sweep. They will be able to provide a thorough inspection and recommend the appropriate repairs.
Furthermore, if you are uncomfortable working at heights or do not have the necessary tools or equipment, it is best to leave the job to a professional. They have the proper safety equipment and training to perform chimney repairs safely and effectively.
When hiring a professional chimney sweep, it is important to choose a reputable company. Look for a company that is licensed and insured, and has positive reviews from previous customers. It is also helpful to ask for recommendations from friends or family who have had their chimneys serviced.
Regular chimney maintenance is crucial for maintaining the safety and functionality of your chimney. By following these steps and performing regular inspections and cleanings, you can prevent potential hazards such as chimney fires and carbon monoxide leaks. Additionally, regular maintenance helps to maintain the efficiency of your chimney and prolong its lifespan.
It is important to inspect your chimney for any signs of damage, such as cracks or loose bricks, and address these issues promptly. Regular cleaning is also essential for removing soot and creosote buildup and preventing chimney fires. Replacing damaged bricks and mortar helps to maintain the structural integrity of your chimney, while installing a chimney cap prevents animals, debris, and water from entering the chimney. Lastly, waterproofing your chimney helps to prevent water damage and deterioration.
While many chimney maintenance tasks can be performed by homeowners, it is important to prioritize safety and call a professional chimney sweep for assistance if needed. They have the knowledge, experience, and specialized equipment to safely and effectively perform chimney repairs.
By taking action and maintaining your chimney regularly, you can ensure the safety and comfort of your home for years to come. Don’t neglect this important task – your chimney will thank you!
If you’re looking for tips on how to fix a chimney, you might also be interested in this related article on gutter maintenance and repair. Gutters play a crucial role in protecting your home from water damage, and keeping them in good condition is essential for the overall health of your roof and chimney. Check out this informative article on gutter services to learn more about how to maintain and repair your gutters effectively.
FAQs
What are the common problems with chimneys?
Some common problems with chimneys include cracks in the masonry, damaged or missing chimney caps, creosote buildup, and blockages.
How do I know if my chimney needs to be fixed?
Signs that your chimney needs to be fixed include visible cracks in the masonry, water damage, a leaning chimney, or a damaged or missing chimney cap. You may also notice a strong odor or smoke coming from the chimney.
Can I fix my chimney myself?
While some minor chimney repairs can be done by homeowners, it is generally recommended to hire a professional chimney sweep or mason for more extensive repairs. Attempting to fix a chimney yourself can be dangerous and may cause further damage.
What is the process for fixing a chimney?
The process for fixing a chimney will depend on the specific issue. A professional chimney sweep or mason will typically inspect the chimney to determine the cause of the problem and then recommend a course of action. This may involve repairing cracks in the masonry, installing a new chimney cap, or cleaning out creosote buildup.
How much does it cost to fix a chimney?
The cost of fixing a chimney will depend on the extent of the damage and the specific repairs needed. Minor repairs may cost a few hundred dollars, while more extensive repairs could cost several thousand dollars. It is recommended to get a quote from a professional chimney sweep or mason before beginning any repairs.